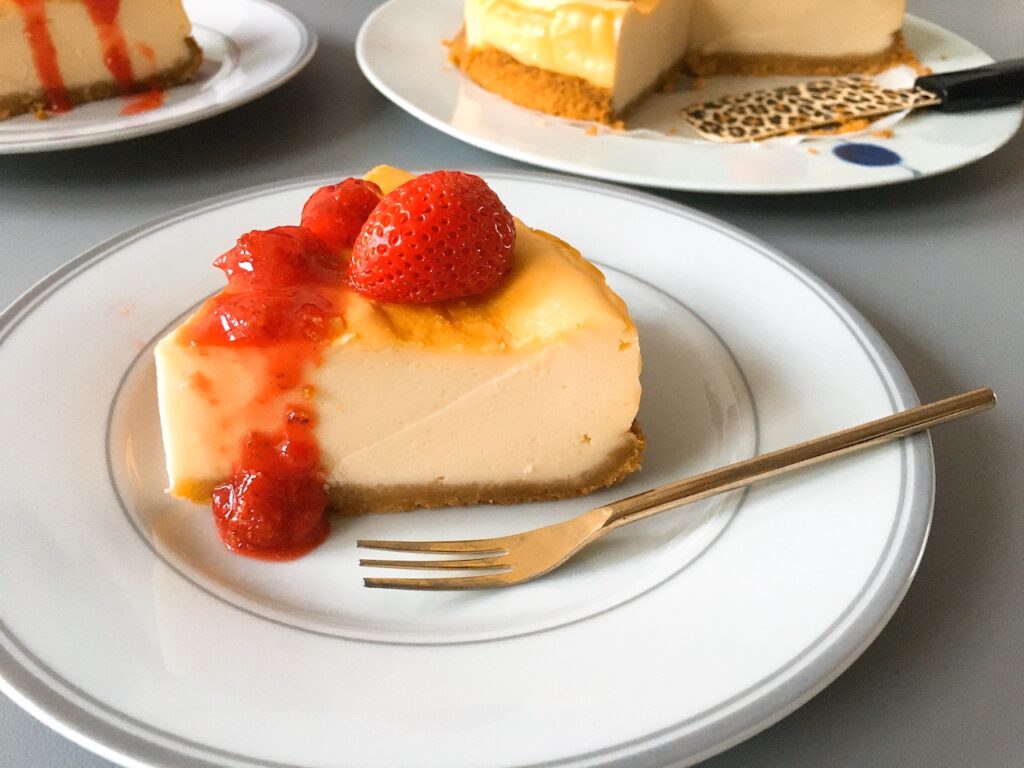
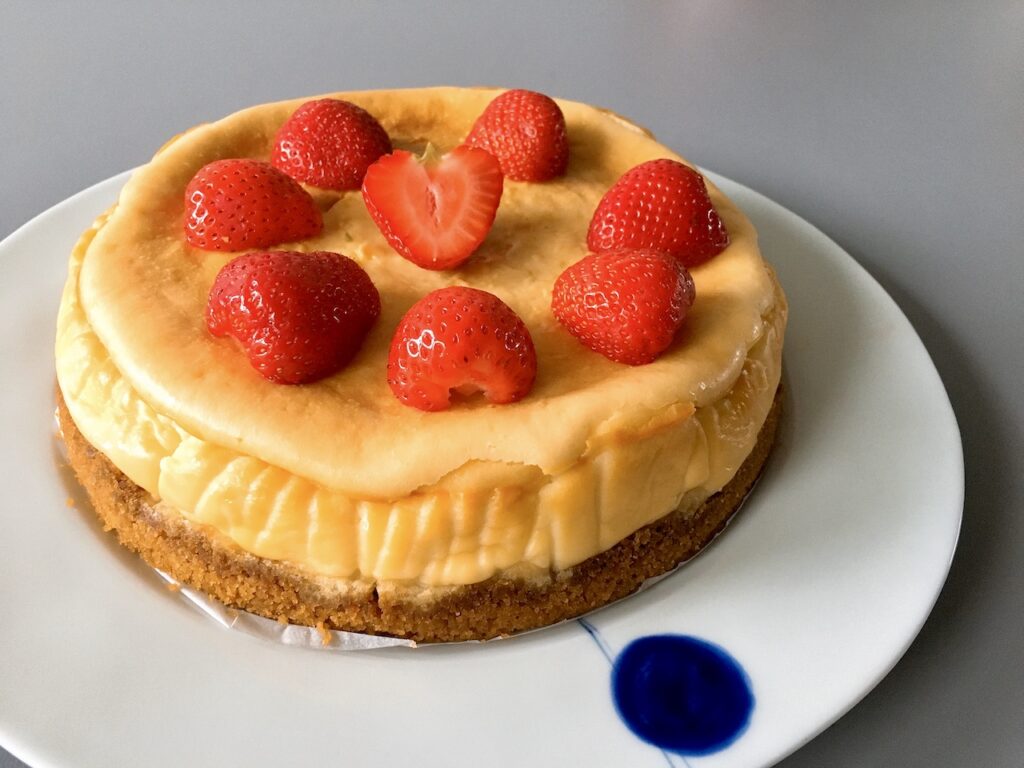
Wait, what? This baked cheesecake is made by Curry Boy, first time? Yes! He opted for a Japanese cheesecake with a biscuit base and strawberry sauce, and the result was really great! Let’s dive into how Curry Boy managed to turn a classic dessert into something special for my special day!
For my birthday this year, Curry Boy whipped up a delicious cheesecake for me. He didn’t skimp on effort. Not only did he make the cheesecake itself, but he also prepared a homemade biscuit base and strawberry sauce that were both tasty and visually impressive!
Initially, Curry Boy explored some foreign cheesecake recipes. He was shocked by the sheer amount of cheese and sugar—some recipes called for up to 900 grams of cream cheese! That’s a lot more than what’s typical in Asian recipes.
Instead, he decided to follow a Japanese cheesecake recipe, which is more modest in its ingredients:
- 200g cream cheese
- 90g sugar
- 2 eggs
- 200g cream
- 30g cake flour
However, the cream cheese we had on hand came in 175g boxes, which wasn’t quite enough. So, we used two boxes, added a bit more sugar, an extra egg, and 10g more flour to adjust the recipe.
Bake in the Morning, Enjoy at Night
A key tip for making cheesecake: once it’s baked, it needs to cool down before chilling in the fridge. So, plan to make it a bit ahead of time. If you want to enjoy it the same night, start baking in the morning to ensure it’s ready by evening.
With this approach, you’ll have a delectable cheesecake that’s both easy to make and sure to impress!
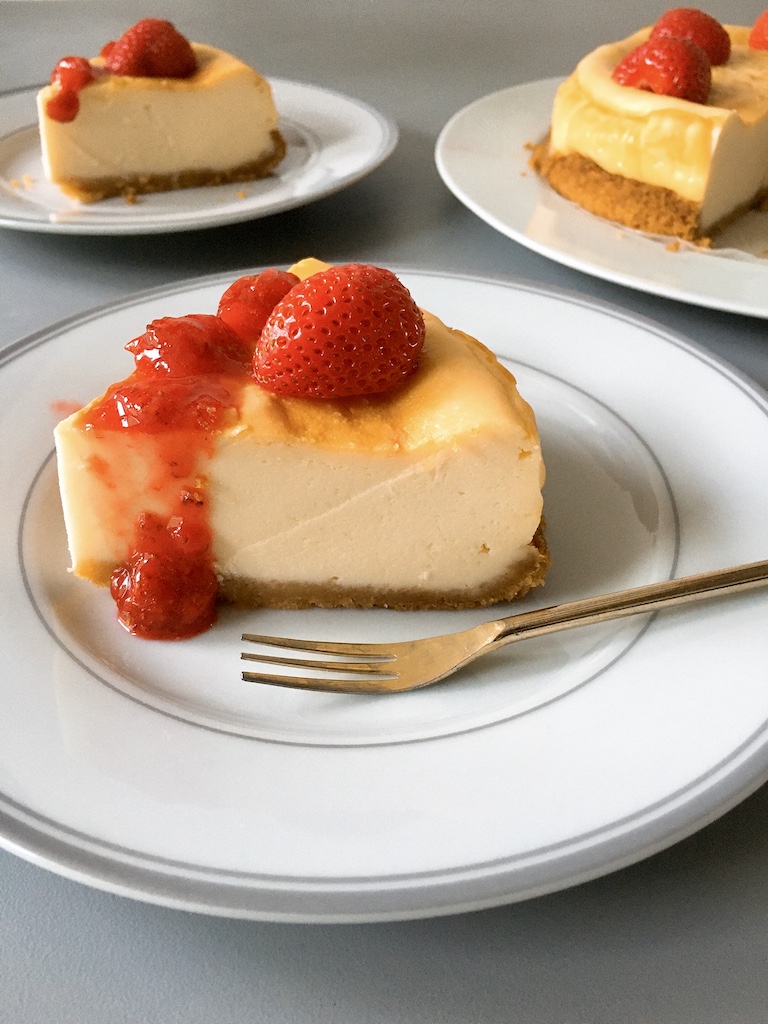
Although the outer layer was not perfect, but considering it’s Curry Boy’s first try, I think he did an awesome job!
Baked Cheesecake with Fresh Strawberry Sauce Recipe
Ingredients
Makes:ø18cm round cake
For cheesecake filling
- 350 g cream cheese (at room temperature)
- 200 g heavy cream (30%fat)
- 40 g plain flour
- 3 eggs (at room temperature, whisked)
- 100 g sugar
- ¼ lemon juice
For biscuits base
- 100 g plain biscuits
- 40 g salted butter (melted)
For strawberry sauce
- 100 g fresh strawberries
- 30 g sugar
- lemon juice
- water
For garnish
- fresh strawberries
How to Make
- Prepare the biscuits base: Crack the biscuits to crumbles, add melted butter and mix well, place it on the cake mould and press tight. Bake in 180ºC oven for 10 mins, then let it cool down.
- Make the filling: In a big bowl, stir in cream cheese and sugar until creamy, gradually pour in the beaten eggs and mix well. Then pour in the heavy cream, again mix well. Followed by slowly sift in the flour, mix until smooth, then add the lemon juice.
- Step for water bath (optional): Wrap the outer part of cake mould 2-3 layers of foil, prepare for water bath.
- Pour the filling into the cake mould and pop into an 170ºC oven. Add boiling water to the baking tray to create steam (for water bath). Bake for about 80 mins, or until the cheesecake surface turned slightly golden brown.
- Pierce through a stick. If it comes out clean, then the cheesecake is done. Let the cake cool down and put into the fridge for a few hours to chill.
- Make the strawberry sauce: Cut the strawberries into small pieces. In a small pot, place in all the sauce ingredients and cook over low heat. It will then turn to a watery jam. Keep cooking until it reaches a slightly runny jam consistency. Pop it into the fridge to chill.
- To serve, pour the strawberry sauce over the cheesecake, and garnish with fresh strawberries.
Note about water bath: Some say water bath is very important for baking this cake, it helps preventing the cake from crackling; some say it is not necessary, since cake also won’t crack even without water bath. I haven’t had it test though, so I can’t comment. But this time I did used water bath and the result was great.