I still remember the excitement when I first made the Japanese bread (食パン, shokupan). It was far from perfect, not soft enough, but I was quite happy with the result.
I referred to this Japanese recipe.
Ingredients
Makes : 1斤(600 g)
- 260 g bread flour
- 3 g dried yeast
- 15 g sugar
- 5 g salt
- 13 g milk
- 186 g warm water
- 26 g unsalted butter in room temperature
How to Make My First Japanese Bread (Shokupan)
- Mix yeast in warm water, stir well. Mix flour, milk, salt and sugar together. Slowly pour over the yeast water.
- Knead the dough until it’s smooth and not sticky. If it’s too wet, don’t add flour, just keep kneading. Then add butter, again keep kneading.
- Do a window pane test. Ideally you should have a thin film while keep on stretching. Cover with cling film and let proof for 50 mins. After that, do a punch down, again let proof for 50 mins.
- Divide the dough into 2 parts, rest for 30 mins.
- Brush the shokupan mould with butter, don’t forget the cover. Preheat oven to 230ºC.
- Shape the doughs into oval, fols both sides towards the centre, roll them up like a towel.
- Put the doughs into the mould, in-between should have space. While doing the 2nd proof, doughs will rise to 1″ under the mould ad fill the gap between the doughs.
- Lower the oven temperature to 210ºC, bake for 30 mins.
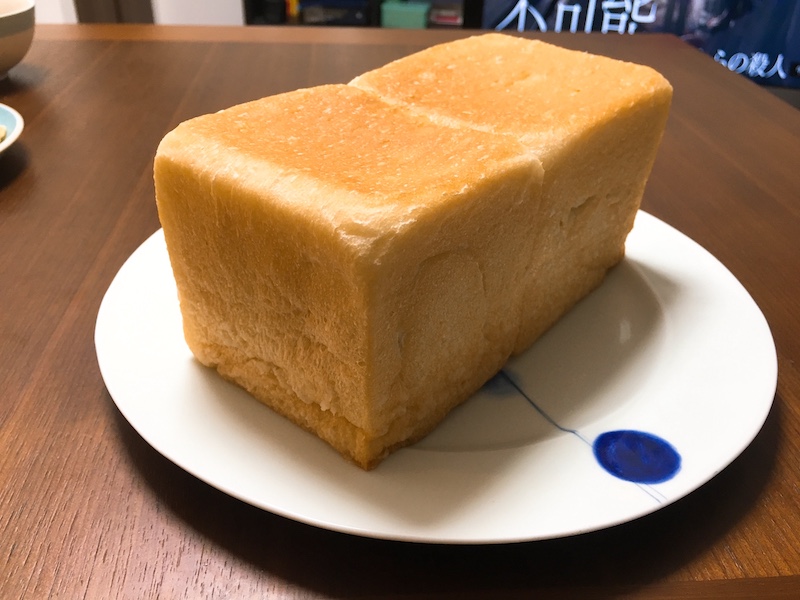
After 30 mins, my first shokupan is done! Since the mould is fully covered, you couldn’t see how it’s going, did it rise enough, all you could do is waiting.
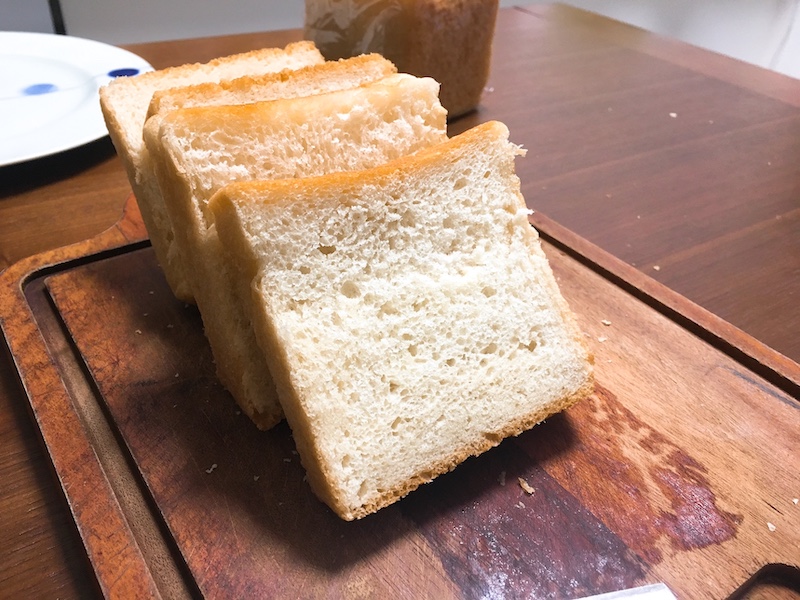
When I slid open the cover, the buttery and wheat flour aroma filled the room immediately, and I peeked the golden edge, screamed and slid closed the cover again. “Come! The bread is done! Are you ready?” I pulled Curry Boy to see this freshly baked bread. I slowly slid opened the cover again, “Wow!!!” It changed an ordinary home to a premium shokupan bakery. hahahah!